


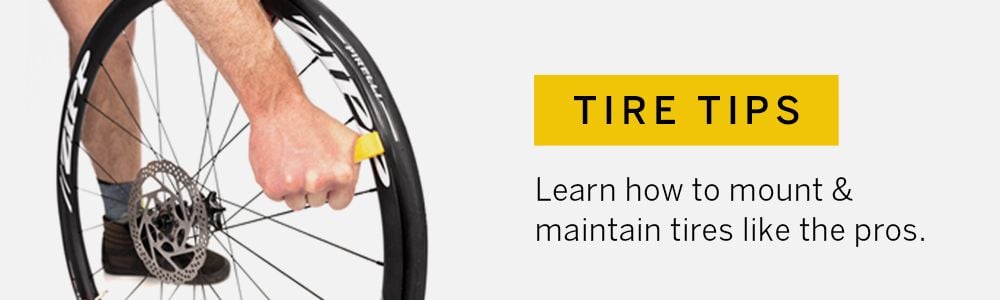
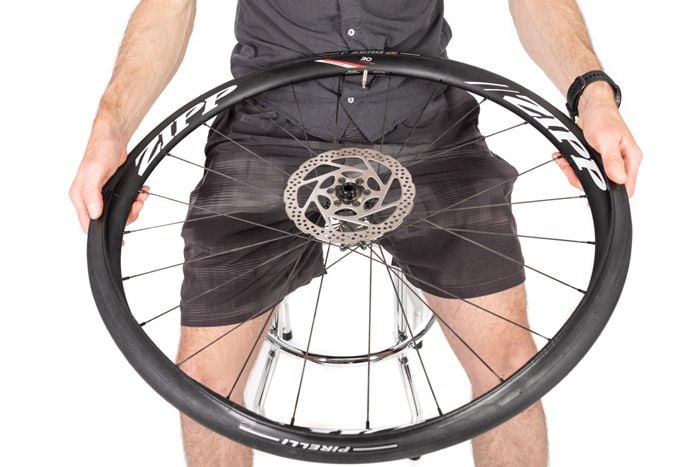
Tire Tips
Congratulations! You've just purchased new tires (and tubes? sealant?) from BikeTiresDirect, and now you stand before your bike ready for installation. The open roads and gnarly trails are calling to you and your new rubber, but you have one crucial step to complete first.
Here at BTD, we are all avid cyclists who have successfully (and unsuccessfully) installed tires, so we've been there. To help, we've assembled this list of tips and tricks. Your Local Bike Shop can always help you out if you need them, but perfecting the art yourself can save you from an embarrassing call for pick up in the middle of nowhere.
This list is divided between tubed and tubeless tires. But, you may notice most of the mounting tips are quite similar.
Tubes
Tip 1: Protect the Tube
Your first order of business is to make sure that the rim bed is properly taped and clear of sharp points. Double check to make sure the rim tape covers all of the spoke holes, and run your fingers along the inside of the rim to make sure it's smooth. Likewise, make sure inside the tire itself is free of pointies, especially if you just had a flat. There are more than enough things trying to puncture your tubes outside the tire, you don't want anything inside to do it before you even get started.

Tip 2: Everything In Its Right Place
We all know bikes that look cooler go faster (trust us). And if you want to look like a pro, be sure to line up the brand logo on the sidewall of the tire with the valve stem hole. But it's not just for aesthetics. This makes it easier to find the valve stem when inflating and, on many tires, puts it near the recommended pressure (if you have to check.)
Lining up the logo with the valve also gives you a static reference point between the tube and the tire for finding punctures. If you pull the tire off the rim and find the cause of the flat on the inside, you can then align the tube with the tire to find the hole in the tube. Think of it as a central orientation point.
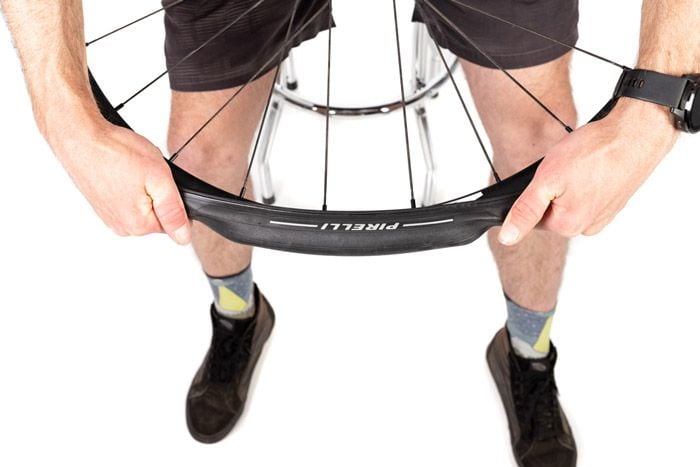
Be sure to start this alignment when you mount the first bead to the tire (without the tube yet). This is also the time to make sure that the tread pattern is going the proper direction. Look at the rotational indicator on the sidewall (see photo) for the correct orientation.

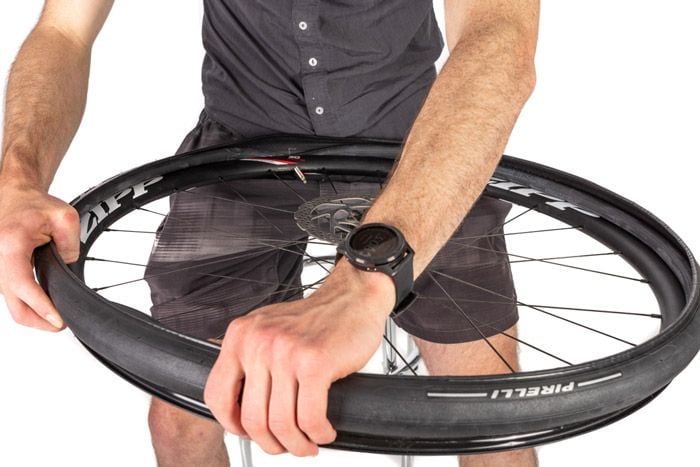
Tip 3: Bead, Valve, Bead.
Get one tire bead all the way onto the rim first. Then insert the tube, starting with the valve stem. Then mount the second bead beginning at the valve.
Tip 4: Blow It Up (just a little bit)
Now is the time for a little finesse. If you inflate your inner tube just a little bit before installing, it will hold its shape better and help prevent it from getting twisted when pushed into the tire. But (and this is crucial) don't inflate the tube too much, or problems can occur. An overinflated tube will not only make mounting the bead harder, it will also be in danger of pinching as you do it. You can even give the tube some air, slot it into the tire, and then take some out just to be sure.

Tip 5: Keep It Loose
To ensure you have optimal slack to get both beads around the rim, push the already mounted first bead into the inner groove of the rim. You can loosen it up by massaging the tire using both hands. If your bead is already locked into the rim hook, the other side will be a lot tighter going onto the rim after.
Tip 6: Dinner Time.
When pushing on the second bead, hold the wheel with two hands like a big serving tray. Hold the valve side to your chest, and start to massage the bead in with both hands, starting at 6 o'clock, and working your way up on both sides. Try using your palms when pushing the bead in place because you can apply more distributed pressure with this part of your hand.
Tip 7: The Hard Part (Also, Don't Pinch The Tube)
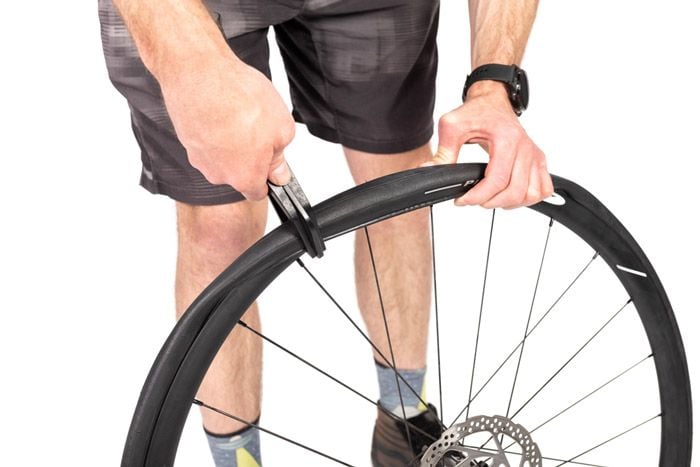
By now you've probably got the tire all the way on the rim except for that last little bit. Sometimes you'll have enough slack (and/or strength) to get the tire all the way on using your powerful palms, but in the event that you can't, here is where tire levers or a Tire Bead Jack come into play.
However, when using a tool to force the last bit of tire onto the rim, be ultra cautious about pinching the tube. Bad tire levers (or worse, other objects) can pinch the tube or even damage the rim if used improperly. It's always smart to get a good pair of levers to save yourself the cost of damages.
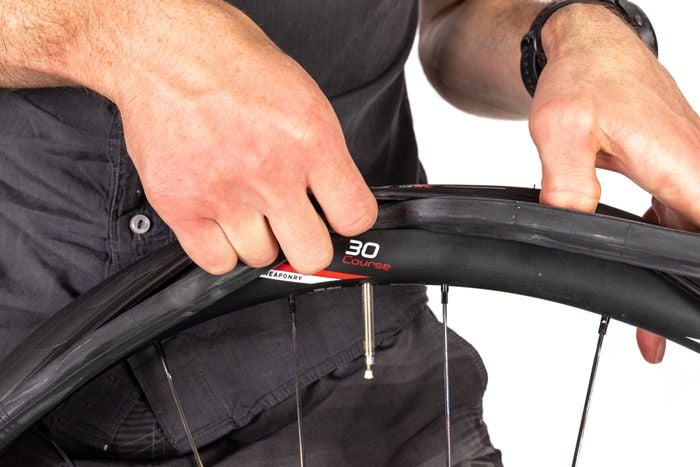
Tip 8: The Kool Stop Tire Bead Jack
For real though, get yourself one of these. The tire bead jack is a great way to get around the most difficult part of mounting a tire. If you've long struggled to get that one last bit of tire onto your rim, the first time you use this tool might just feel like magic. It easily hooks onto one side of the rim while grabbing the loose tire bead, creating an astonishing amount of leverage (see photo). And it's made of forgiving plastic that wont damage your rims.
Tip 9: Push Down The Stem
One of the prime places a tube can get pinched during installation is around the valve. So it's imperative that you push the valve into the rim before inflation.
Tip 10: Quarter Pressure Pitstop
Before you crank the PSI up to your preferred pressure, be sure to inflate to around 25% of the max, and check the area between the rim and the tire to make sure there isn't the tube isn't sticking out of the side anywhere. If there is a bit of tube protruding or a weird lump in the sidewall, deflate and massage the tube back into place. Do not just try to ride the lump away — you're not ready for how loud the innevitable pop will be.

Tip 11: Some Warnings
Once you're sure that the tube is fully encased within the tire, you are ready for inflation.
But First...
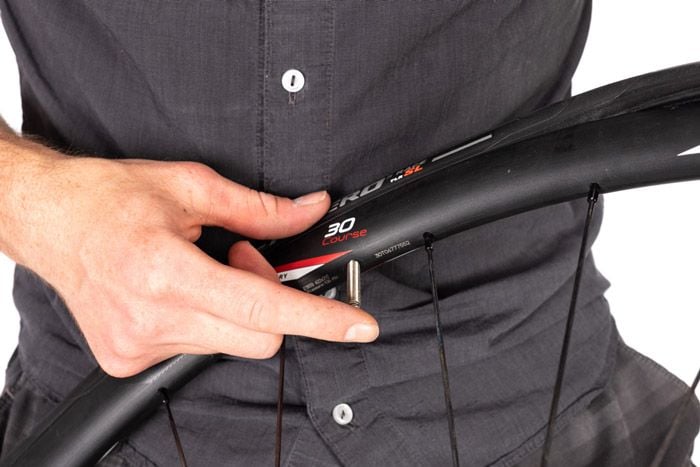
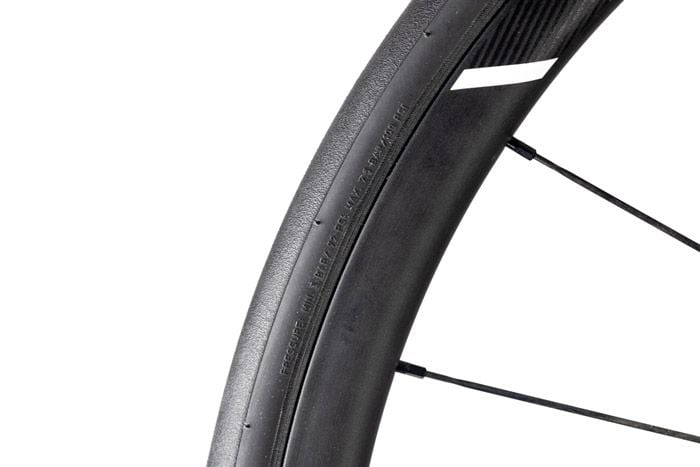
The min/max inflation range can be found on the sidewall of the tire* (see photo), and we strongly recommend that you inflate the tire within these parameters.
One More Thing
We will also caution you against inflating to the maximum pressure right away unless you know the capabilities of your rim. The wheel itself also has a limit and it is not uncommon to find the maximum pressure on the tire is higher than what the rim can handle. If your rim does not have its max PSI listed, we suggest contacting the manufacturer for that spec before risking it.
Please Be Seated
The first full inflation will fully seat your tire in the rim and strengthen the bond between the walls and the bead. Depending on the tire and rim combination, there may still be a little wonk if you put the wheel back on your bike and give it a spin. We suggest taking the tire for a short ride around the block and then assessing again if there is still a hiccup in the rubber. Usually a short ride with the weight of the rider will smooth out any imperfections.
*Some tire manufacturers may identify the max tire pressure with kPa (Kilopascal) or BAR. The conversion is complicated, so we suggest just plugging it into your trusty search engine to see what the kPa translates to in terms of PSI (which is the pressure measurement on most American pumps).
Tip 12: New Tread Cautiously
There you have it, your tire is on and your ride awaits. However, we speak for moms, dads, partners, kids, and friends everywhere when we say be careful when you first test out a new tire tread. Sometimes they are not as grippy around corners as your previous ones — conversely, they might be too grippy when you don't expect it. New tire day is a very exciting time for us at BTD, so we've definitely made the mistake of sending it prematurely and promptly eating it. Tires are a crucial part of the machine, and just like the rest of the bike, you need to get used to how they operate.
Tubeless
Tubeless tires aren't exactly new these days, but compared to tubes they're just a baby. Tubeless installation sounds daunting, but it's actually not that bad if you know the right steps to take.
In addition to the improvements in ride quality and performance, functionally, going tubeless also marks a revolution in maintenance and utility. A properly installed tubeless system trades a little extra work at home for much less work in the field. Flats and punctures can still happen, but once you install a tubeless tire you might never have to take it off again before replacing it. Here's how to make it happen.
Tip 1: Do I Need Tubeless Tape? Yes. Yes, You Do.
Tubeless rim tape is the foundation of any quality setup. The main function of this tape is to prevent air and sealant from leaking out of the spoke holes and improve the seal on your valve stem (more on that later). Many new tubeless wheels come with this tape preinstalled, but others do not.
Many wheelmakers will specify the width of tape they recommend for any given wheel, but absent this information, we suggest going a few milimeters wider than your rim's internal width to account for covering the central channel. Cycling lore is full of rumors of alternative options for taping your rims but we recommend a purpose engineered tape from a sealant maker like Stan's, Orange Seal, Muc-Off, or your wheel's manufacturer.
Start at the valve hole and then wrap the tape around the entire rim slowly and methodically, being sure to smooth out any large bubbles. A standard wrap will layer back over the valve hole plus two or three spoke lengths. Though double wrapping the rim is not a bad idea if you crave extra security (for an incredibly minimal weight penalty.)
Tip 2: Pick Your Poison, I Mean Sealant.
While there are many tubeless sealants out there, we generally recommend the same big three as for tape: Stan's, Orange Seal, or Muc-Off due to their consistent performance.
Stan's (Regular) and especially Orange Seal Endurance last quite a long time before they need replenishing, which can come in handy if you are a beginner or just lazy (like many of us.) For less longevity but more raw sealing power, turn to Stan's Race and Orange Seal (Regular). Muc-Off tends to be more balanced between the two.
In the event that you ride in really cold conditions, Orange Seal Sub Zero Sealant is designed to work in temperatures as low as -20F.
How much sealant you need will depend on your tire size (objective) and the porousness of the rubber (vibes). Here is what we recommend:
- 28mm-40mm Road, Gravel, or Cyclocross
1oz - 2oz (29 - 59ml) - 40mm-50mm Gravel, Commuting, or Touring
3oz (89ml) - 26' MTB
2oz - 3oz (56ml - 88ml) - 29er / 27.5 (2.0-2.6') MTB
3oz - 4oz (89-118ml) - Fat bike tires (26' or 27.5' x 2.8'+)
4oz - 5oz (118-147ml)
Tip 3: No Screws Loose
After your wheel is taped, cut a small slit over your valve hole, punch the valve stem through and tighten the locking nut.
Valve stems will make your life much easier, but they are also prime spots for leaks (both internal and external). Outside, check your stem nut. Finger tight is fine (don't overdo it) but it does need to be tight enough to hold air.
Inside your stem you have your valve core, which can be unscrewed. Removable cores are a genius trick because they mean you don't have to take the tire off the rim when you can put sealant in through the valve. We advise that you use a Valve Core Removal Tool as it is a very delicate piece of metal.
Some sealants with larger plugging particles can't go in through the valve stem and some folks just prefer to pour sealant into the tire directly. But for the rest of us, this is the simplest, cleanest point of sealant ingress. (But first, lets get your tire on.)

Tip 4: Mount Up
The hardest part of tubeless setups is locking the bead of the tire into the rim. This is what makes it airtight but to get there you need to put air into it when it's not airtight.
Many regular floor pumps lack the high volume airflow necessary to pop the bead into place. But while this used to be nigh impossible, you'd be surprised at how many modern tubeless tires have been adapted for easy installation. Especially if you can get the bead almost to the edge when you put the tire on, a regular pump just might do it with some extra elbow grease. The luxury of an air compressor will greatly help this process along if you have one. Or you could invest in a burst pump like the Lezyne Pressure Over Drive that lets you charge up a cannister before releasing a concentrated blast.
However you do it, one easy way to make sure you get the airflow you need is to remove the valve core (which you're probably going to do later anyway) and pump directly into the stem. It obviously won't hold air like that but you don't need it to; you just need to get the beads locked. 'How do I know the beads are locked?' Oh, trust us, you'll know. There will be a very loud pop or two. (You're allowed to be scared by this.)
The Tube Workaround
If all else has failed and you don't have the heavy machinery, there's one last hack at the bottom of the barrel: get a tube.
Inflating a tubeless tire with a tube first will allow you to pop the beads into place as easy as its always been. It'll take some finagling but it's entirely possible to then pop off just one side, remove the tube, install your valve stem, and then try again with one bead already in place.
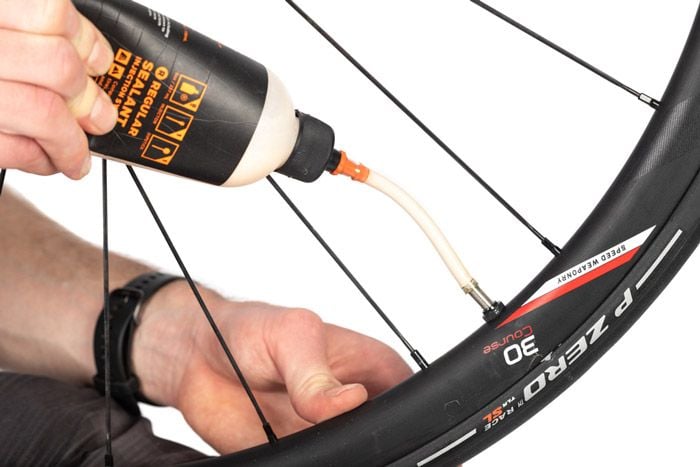
Tip 5: Fill 'er Up
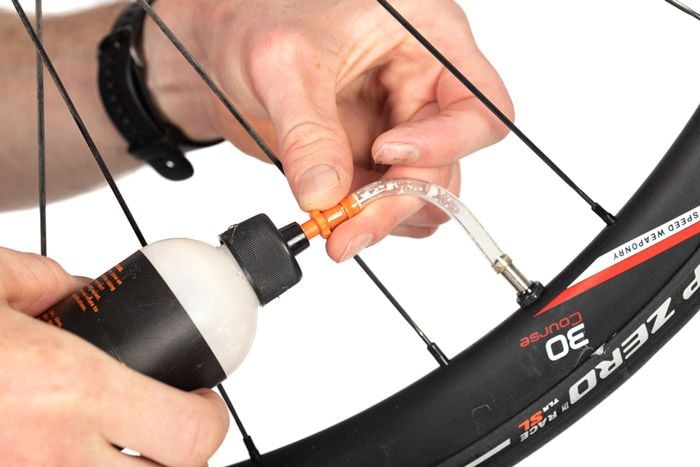
Now that you have your tire mounted and both beads locked into place, it's time to inject your sealant. With your tire deflated remove the valve core (if you haven't already.)
If you want to feel like a scientist and minimize mess, we recommend an injector like these from Park Tool or Stan's to let you measure out the precise amount of sealant you need and plunge it directly into the stem. (Be sure to flush and clean these after use to prevent sealant blockages.)
Many sealants come with injector attachments on their smaller bottles, like Orange Seal Endurance 4 oz or Stan's 2 oz. These little bottles are also pre-portioned for the most common sealant doses. Which means you not only don't have to measure anything, you can also re-fill and re-use them when paired with a bigger bottle. However you do it, be sure to agitate the sealant bottle beforehand to disperse the heavier particles that may have settled at the bottom.
Once you have the appropriate amount of sealant in the tire, screw the valve core back on tight and inflate it back to max PSI.
I, Too, Like To Live Dangerously
*If you are feeling confident, (or have opted for a large particle sealant like Silca) some people will just pour the sealant into the tire before they lock the second bead into the rim. It definitely works, but don't be surprised if things get messy, especially if you anticipate any difficulties getting the bead seated.
Tip 6: Sealant: Shaken, Not Stirred
Once you've got your tire on with your sealant in, it's time to shake it up. Depending on the tire and rim combo, you may stlil be losing a little bit of air. Shake, spin, and otherwise agitate the wheel to get that sealant dispersed and into every part of the wheel. Before it ever has to deal with any punctures, sealant's first job is to seal up any tiny imperfections.
Once your wheels are well and truly airtight, the best way to keep that sealant moving is to throw the wheel back on your bike and ride it around a little. Don't let it just sit around and pool up. If, for whatever reason, you can't though, store them on their side for better sealant dispersion. (And flip 'em like pancakes after a while to get sealant into the other sidewall.) The morning after setup tubeless tires will likely have lost some air. Don't panic. Just re-inflate and continue shaking; or better yet, riding!
Safety Tips
Proper mounting of tires and tubes is critical for safety. If you have never changed your bike tires and tubes before or do not feel fully capable of doing so, you should ask a bike mechanic for assistance. If you just need a little how-to reminder, check out our article on Tire and Tube Replacement.
- On your first ride with brand new tires, take it easy around corners. New tires are often slicker direct from the factory than they will be once they're broken in a little bit.
- Non-tubeless Clincher tires (i.e. not tubulars) require hooked rims. 'Hooked' refers to the ridge on the inside of the rim that holds the Kevlar or wire bead of the tire in place.
- Conversely modern 'Hookless' rims require hookless compatible tires. These days this is more or less synonymous with tubeless ready over 28c since hookless rims have a max PSI of 73. If you're unsure, check with either your tire or wheel manufacturer.
- When you return from a ride, wipe down your tires with a rag and inspect them for embedded glass and debris. Objects embedded in the tire will gradually work their way in and penetrate the casing, potentially causing flats on future rides. Some riders also like to let some air out of their tires after every ride and then re-inflate them before the next one; this practice may increase wear time on tubes but helps prevent potential pressure-related blowouts if you store your bike in a hot place.
- Do not rotate tires by swapping the front and rear. Discard worn rear tires, move the old front tire to the rear, and put a new tire on the front. The rear tire wears faster because it supports most of your body weight and is the main conduit transferring power from your pedals to your drivetrain to the road. On the other hand a front tire faces less wear but is responsible for most of your traction, especially when cornering. You never want a front tire with less grip than your rear.
Bonus Quick Tips
- You can dust your tires with baby powder before installing them to help them seat more easily.
- A little dish soap on the tire bead can make it a little more slippery and easier to slide over the rim.
- Tires with black treads will generally last longer than any other color due to their higher carbon content.
- If your sidewall is damaged while on a ride, a folded dollar bill or energy bar wrapper can be inserted between the tube and the tire as a makeshift tire boot.

If you have any questions regarding the products or procedures detailed here, please feel free to reach out to our customer service team during the hours listed below.
If at any point in this process, your installation seems unsafe, always default to your local bike shop for professional service. DIY is fun, but at the end of the day, safety comes first.
Happy riding! Email [email protected] Phone (503) 917-0156 Hours:Mon-Sat 8am-5pm PT